For anyone getting started with Photoshop, the pen tool can seem to be very intimidating. This is because most users feel a pen tool, like a normal pen, should draw lines in Photoshop as you drag it across the canvas. Yes, the pen tool can do that, but in a different way. And by different, I mean accurate.
Mechanics of the pen tool
A pen tool is different from any other drawing tool. It is specifically designed to help you draw the exact kind of curves which you want to. It takes a bit of patience in the beginning to get a hang of it but trust me, it’s worth it.
Pen tool is all about placing two points in space and bending the line in between the two points to allow you to draw perfectly smooth curves.
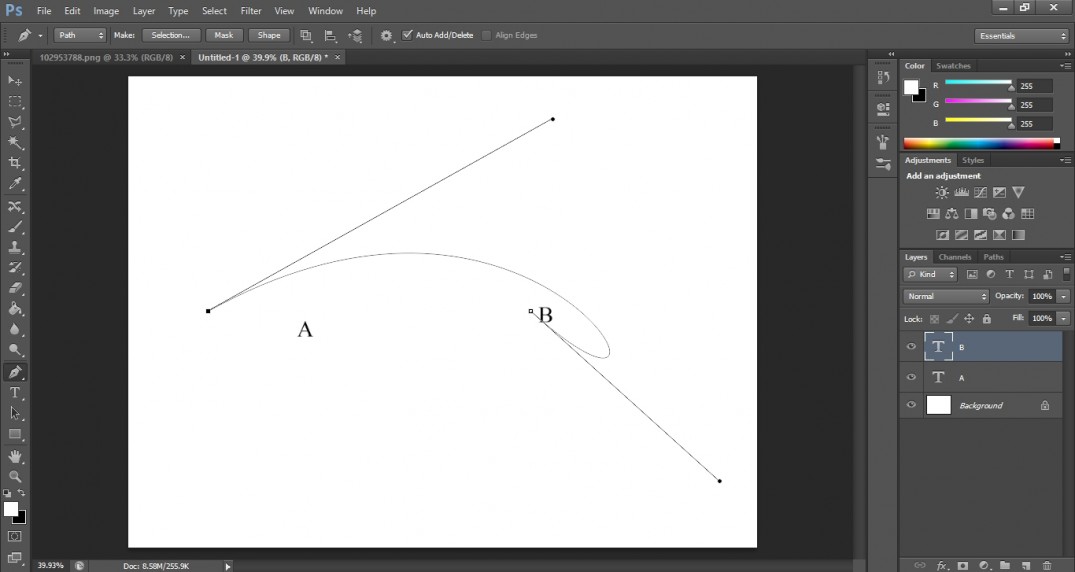
Let’s say I put two points A and B on photoshop canvas

I want to make a curve in between them. So, I will click on the centre of the line to place a bending point.

You will see that the bending point is a square with two circular dots on either side. The two circular dots are connected to the square bending dot in a straight line and this straight line is exactly parallel to the line that points A and B make.
Square bending point
The square bending point is the point which will help you draw a curve. Just by clicking and dragging it you will be able to make the line between point A and B curve.

You can also drag it diagonally to make skewed curves.
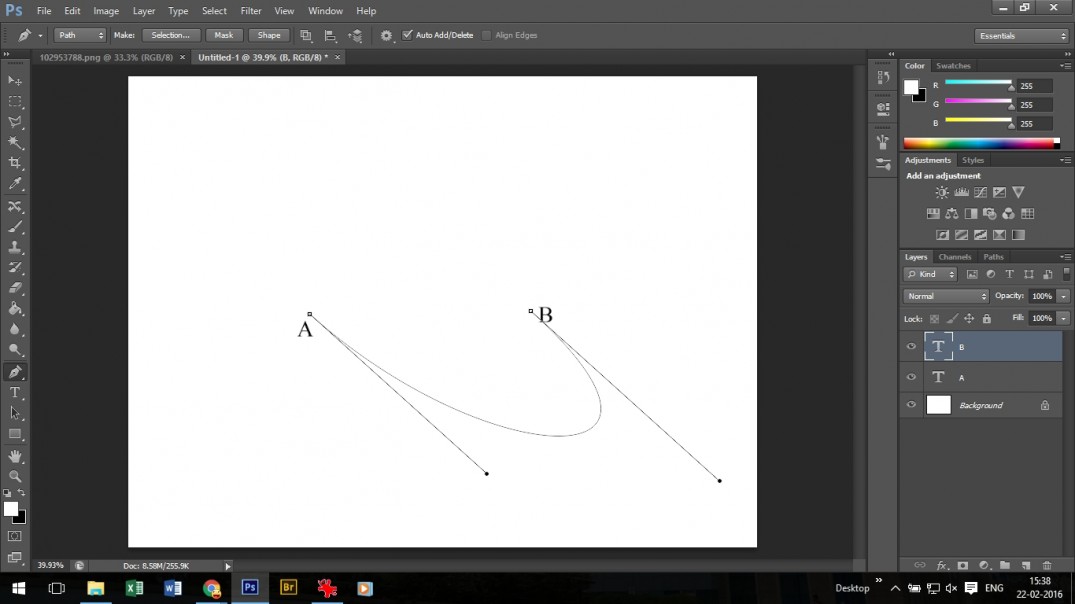
Two circular dots
The two circular dots on either side of the square bending point will help you further alter the curve between point A and the square bending point; or point B and the square bending point.
Now, you will have to press and hold the control button on the key board (command for mac) and then click and drag the circular points.

Also, you can move the original points A and B by pressing down the control key (command key for mac) and click-dragging them with your mouse.
Before you proceed reading further, you can play around in Photoshop by clicking multiple points with a pen tool; make the lines curve and move the various points by pressing down the control key. Try till you are comfortable using the pen tool.
Making selections using pen tool
If there’s one thing that the pen tool is good at, then it’s making the most accurate selections. Even if you are using a drawing tab with a stylus, it still won’t beat the accuracy which the pen tool has to offer.
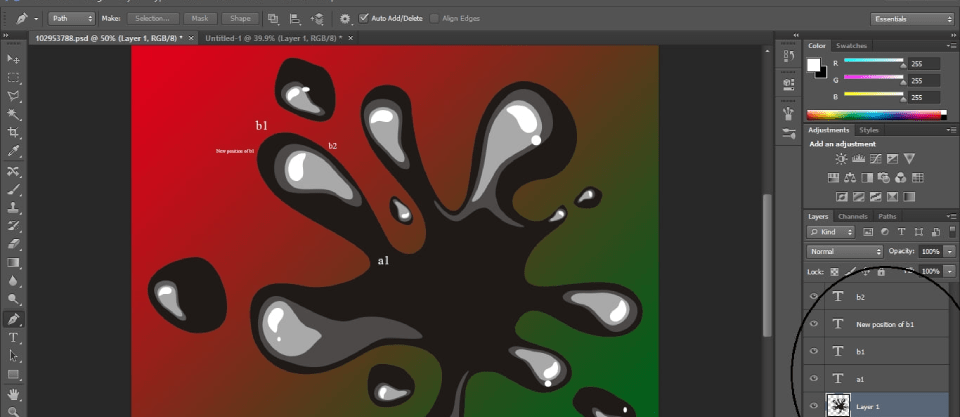
For today’s tutorial, let’s take an example of this image.

Let’s try cutting out this splash vector from the image. This is what we’ll do.
- Select the pen tool

- Click on one point on the contour of the splash and another somewhere over here. Let’s mark them as a1 and b1

You can see that the contour of the splash between these two points is an s-curve.
-
Place a control point in the centre of the two points a1 and b1. Click and drag this control point to make a curve between a1 and b1.

- Since this is an s-curve, you’ll notice that the curve is more of a c shape and is not fitting the exact path between a1 and b1. Now is the time to use the circular dots on either end of the control point.
-
Adjust the circular dot near b1 to get the curve right between the control point and b1. Remember to press down the ctrl key (cmd for mac) while clicking and dragging the circular dots. You will see that it’s pretty close but the curve can still be perfected.

-
Now, we will reposition the original points. Press down the ctrl key and click and drag the point b1.

You can see that you have now drawn a perfect s-curve with the pen tool control points.
-
Add a new control point b2 next to b1 and repeat the same steps. Remember to reposition the circular and square control points to get your curve right. You can add more than one control point between two points.

-
Keep placing new pen tool points and continue the same steps until you get back to your first pen tool point and make a full circle.

-
Right click on the image and select ‘make selection’.

-
Just hit ok in the next dialogue box.

-
You will now see that marching ants selection has appeared on the path you’ve made with the pen tool.

-
Press ctrl (cmd for mac) + c and then ctrl + v to paste your selection on a new layer (layer 1).

-
Hide all the other layers to see that you have made a copy of your selection on a separate new layer.

Making selections is just one of the uses of a pen tool. There are other uses as well, but we will learn about them all in our future posts.
It might get a little frustrating in the beginning while working with the pen tool. This is because while you are adjusting one curve, the other one starts moving. But remember, you can always move all the points around to get the right shape. Like always, the first step is the hardest. Keep practicing and you will master the pen tool in no time.
Looking to sharpen your photoshop skills? Join our top-rated online photoshop course today!